Set up a mobile app using the PingID SDK sample code
Prerequisites
-
Make sure that you have the following prerequisite, as described in Initial account configurations:
- The Application ID (used in the server side integration).
-
Prepare the iOS push messaging certificates:
If you intend to use push messaging in your app, verify that you have your push configuration information:
- iOS Push Services Certificate: Remote Notification Programming Guide.
Configure iOS push messaging certificates:
- iOS Remote Notification:
- When configuring your PingID SDK application in the PingOne admin web console, you should upload your Apple iOS Push Services Certificate. Find it under “Connect to your application” in the Application Configuration page in the PingOne admin web console.
IDE integration
PingID SDK Demo Application iOS - IDE integration:
-
In the example app, make sure that you change the following settings in
Constants.m, to your customer server URL and the Application ID respectively, which you retrieved from the PingOne admin web console:kCustomerServerUrl kAppID
-
Add the PingID SDK component into your existing project:
- For versions up to PingID SDK 1.4.x:
- In your Project Navigator, click on your target, and drag
PingID_SDK.frameworkto Embedded Binaries. - Check the Copy items if needed checkbox.
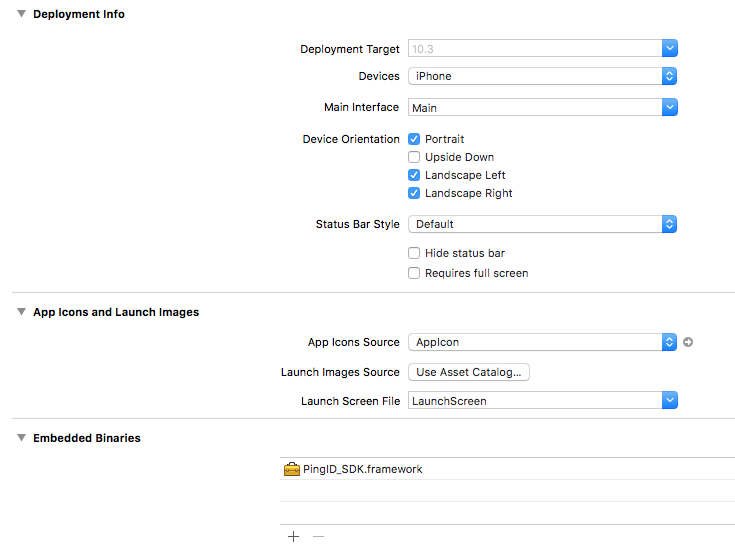
- In your Project Navigator, click on your target, and drag
- For PingID SDK 1.5+:
- In your Project Navigator, click on your target, and drag
PingID_SDK.xcframeworkto Frameworks, Libraries and Embedded Content. - Check the Copy items if needed checkbox.

- In your Project Navigator, click on your target, and drag
- For versions up to PingID SDK 1.4.x:
-
Enable location:
PingID SDK uses location, if it is available. Regardless, add the
NSLocationWhenInUseUsageDescriptionto yourinfo.plistwith a short description. ImplementCLLocationManager, and ask for location permissions. -
For versions up to PingID SDK 1.4.x, setup the Run Script phase:
-
Make sure that the Run Script phase is after the Embed Frameworks phase.
-
Select your application’s Xcode project, then your application target, and then select Build Phases, click +, and then New Run Script Build Phase.
-
Paste the following line into the body of the Run Script Build Phase:
bash "${BUILT_PRODUCTS_DIR}/${FRAMEWORKS_FOLDER_PATH}/PingID_SDK.framework/strip-frameworks.sh"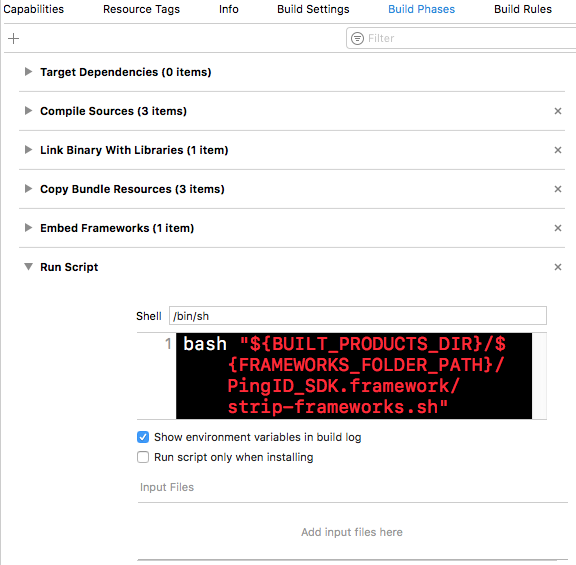
-
-
Project build settings:
In your target, set Always Embed Swift Standard Libraries to YES.
Implement the PingID SDK in your code
This section details the implementation steps of the PingID SDK flows and logic, which are described in Multifactor authentication (MFA) methods and User device pairing.
- Configure remote notification: If you intend to use push messaging in your app, you should have your Apple iOS Push Services Certificate ready. Upload the certificate in the PingOne admin console: Go to Setup > Certificates.
- Integrate the PingID SDK component into your code:
-
Initialize the PingID SDK singleton. Import the framework into your application initialization code :
#import <PingID_SDK/PingID.h> -
Call the
initWithAppIDmethod, passing the Application ID requested from the admin (from the PingOne admin console) when the application was created.Language Example Objective-C [PingID initWithAppID:##YOUR_APP_ID_HERE##];Swift PingID.initWithAppID(##YOUR_APP_ID_HERE##)-
Call the
initWithAppID:supportedMfa:method with the required registration mode for pairing (MFA type):-
Objective-C:
[PingID initWithAppID:##YOUR_APP_ID_HERE## supportedMfa:##PIDSupportedMfaType##]; -
Swift:
open class func initWithAppID(##YOUR_APP_ID_HERE##, supportedMfa:##PIDSupportedMfaType##)
Registration mode value Description PIDSupportedMfaTypeAutomaticMFA supports remote notifications with automatic fallback to one time passcode. PIDSupportedMfaTypeRemoteNotificationMFA supports remote notifications only. PIDSupportedMfaTypeOneTimePasscodeMFA supports one time passcode only, and will not support remote notifications. Make sure that this method is called at the beginning of your AppDelegate
application:didFinishLaunchingWithOptions:method.-
Objective-C:
application:didFinishLaunchingWithOptions: -
Swift:
func application(_ application: UIApplication, didFinishLaunchingWithOptions launchOptions: [UIApplication.LaunchOptionsKey: Any]?) -> Bool
-
-
-
Integrate the PingID SDK component into the authentication process.
-
Invoke the
generatePayloadfunction on every login attempt. -
In the login request to the customer server, add a string parameter, for passing the payload from the customer mobile application’s PingID SDK component.
-
In the authentication request, you’ll receive information regarding the result of the PingID SDK multifactor authentication.
-
-
Working with push messages in iOS
This section details the steps needed in order to work with push messages in iOS.
- Enable Push Notifications: Go to your Project Navigator’s capabilities tab. Select Push Notifications > Enable.
-
Create the APNs certificates for your test and production environments. Refer to: Local and Remote Notifications Overview.
-
Upload the APNs certificates to the PingOne admin console under your app settings. Go to Applications > PingID SDK Applications.
- Verify that push notifications are working with the above certificates before uploading them to the admin console.
-
Enable PingID SDK to send silent notifications when needed:
- Go to your Project Navigator’s capabilities tab.
- Select Background Mode > Enable.
- Check Remote notifications.
-
Register Push: In order to receive push notifications from PingID SDK, use the following code in your
didRegisterForRemoteNotificationsWithDeviceTokencall:Language Implementation Objective-C + (void)setRemoteNotificationsDeviceToken:(nullable NSData *)deviceToken;Swift open class func setRemoteNotificationsDeviceToken(_ deviceToken: NSData?)using the actual
deviceTokenstring, without spaces and brackets. -
Handling Push Notifications: PingID SDK will only handle push notifications which were issued by the PingID SDK server.
-
Objective-C:
Inside the following method:
- (void)application:(UIApplication *)application didReceiveRemoteNotification:(NSDictionary *)userInfo fetchCompletionHandler:(void (^)(UIBackgroundFetchResult result))completionHandler;Call:
+ (BOOL)isRemoteNotificationFromPingID:(nonnull NSDictionary *)userInfo;with the
userInfo NSDictionary. If the notification is not from PingID SDK, it will not be handled.If the push was received from PingID SDK, pass the
userInfoto:+ (void)handleRemoteNotification:(nonnull NSDictionary *)userInfo completion:(nullable void(^)(PIDRemoteNotificationType remoteNotificationType, NSArray * _Nullable availableTrustLevels, NSDictionary * _Nullable sessionInfo, NSError * _Nullable error))completionBlockand handle the response accordingly.
Note that the
handleRemoteNotificationmethod doesn’t handledidReceiveRemoteNotification:fetchCompletionHandler:, and it should be added to your code. -
Swift:
Inside the following method:
func application(_ application: UIApplication, didReceiveRemoteNotification userInfo: [AnyHashable : Any], fetchCompletionHandler completionHandler: @escaping (UIBackgroundFetchResult) -> Void)Call:
open class func isRemoteNotification(fromPingID userInfo: [AnyHashable : Any]) -> Boolwith the
userInfo. If the notification is not from PingID SDK, it will not be handled.If the push was received from PingID SDK, pass the
userInfoto:open class func handleRemoteNotification(_ userInfo: [AnyHashable : Any], completion completionBlock: ((PIDRemoteNotificationType, [NSNumber]?, [AnyHashable : Any]?, Error?) -> Swift.Void)? = nil)and handle the response accordingly.
Note that the
handleRemoteNotificationmethod doesn’t handledidReceiveRemoteNotification, and it should be added to your code.
-
-
Push Notifications Categories: PingID SDK uses categories for different notifications. If your app already uses categories, you will need to retrieve the PingID SDK categories
NSMutableSet, by calling:Language Implementation Objective-C + (nonnull NSMutableSet *)getPingIDRemoteNotificationsCategories;Swift open class func getRemoteNotificationsCategories() -> NSMutableSetand add that to your current categories.