Set up a mobile app using the PingID SDK sample code
Prerequisites
-
Make sure that you have the following prerequisites, as decribed in Initial account configurations:
- The Application ID (used in the server side integration).
- The PingID SDK properties file.
- The application configuration.
-
Prepare the Android FCM credentials:
If you intend to use push messaging in your app, verify that you have your push configuration information:
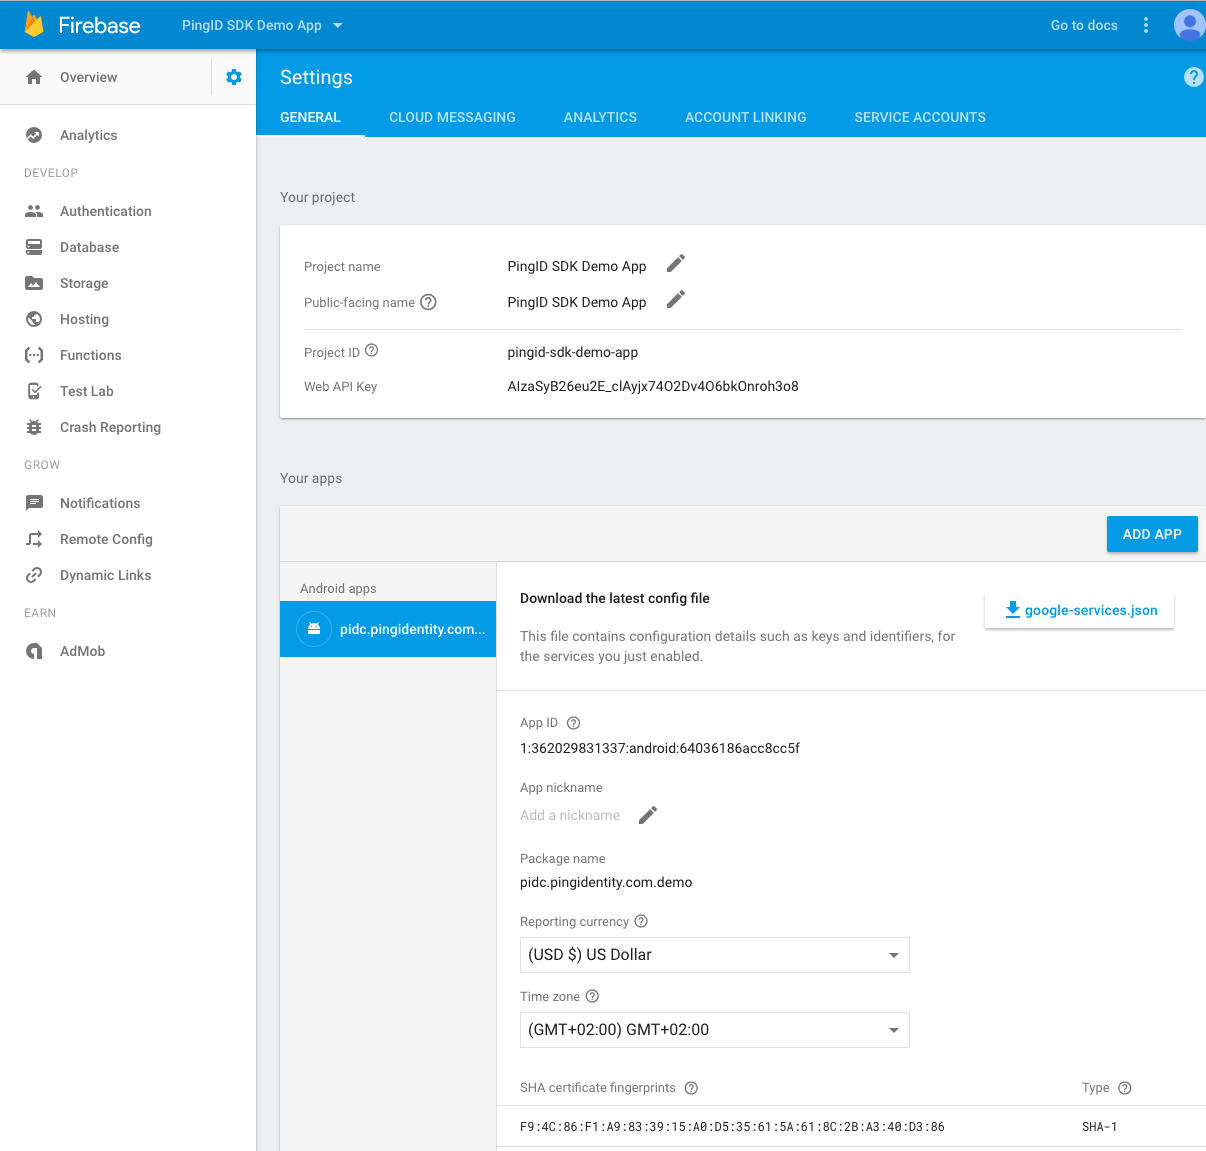
- Google cloud messaging (https://console.firebase.google.com):
- Choose the project or create a new project.
- Click the settings icon (next to “Overview”).
- Select
Project settings. - Select on the
Cloud messagingtab. - Note the value of
Sender ID.
- Google cloud messaging (https://console.firebase.google.com):
Configure Android FCM credentials:
Google cloud messaging:
When configuring your PingID SDK application in the PingOne admin console, enter your FCM/GCM Sender Id and server key. Find it under “Connect to your application” in the Application Configuration page in the PingOne admin console.
IDE integration
PingID SDK Demo Application Android - IDE integration:
Add the SDK into your existing project.
We recommend the following software versions:
-
Gradle version 6.1.1 or later.
-
Gradle Android plugin version 3.6.1 or later.
-
Make sure that the Android SDK installed contains Android API level 30 (Android 11).
The PingID SDK component is compiled using Android API level 30 (Android 11) with build tools version 29.0.3. We recommend you use these settings. -
Configure your project with gradle: http://developer.android.com/sdk/installing/studio-build.html.
-
Make the following changes to your build.gradle files in order to add the PingID SDK component dependency:
-
Open your top level
build.gradlefile, to add the PingID SDK component as a dependency. Add the following lines to theallprojectsnode under therepositoriesnode:flatDir { dirs 'libs' } -
Create a
libsfolder inside your module’s folder. Copy the PingID SDK component filePingID_SDK.aarinto it. -
Inside the module or modules using the PingID SDK component - add the following dependency:
{ compile(name: 'PingID_SDK', ext: 'aar') } -
As the PingID SDK component is loaded locally, you’ll have to add the PingID SDK component’s dependencies manually in order to be able to compile and run it. The correct dependencies can be found in the Moderno sample project and application levels
build.gradlefiles. Due to the change to Android API level 29, AndroidX support is added according to the gradle.properties file in the Moderno sample project. -
Open the
build.gradlefile at the application level, and update the relevant constants from the following list, under thebuildTypessection. Explanations for each constant are provided inline, in the file:Constant Type Description CUSTOMER_SERVER_BASE_URLString The server URL, when using your own customer server.
You can define only one of eitherCUSTOMER_SERVER_BASE_URLorOIDC_ISSUER.APP_IDString The App ID, as defined in the PingOne Admin console. OIDC_ISSUERString When using a PingFederate server, this is the OIDC issuer from which the configuration will be discovered. This is your base PingFederate server URL.
You can define only one of eitherCUSTOMER_SERVER_BASE_URLorOIDC_ISSUER.PUSH_SENDER_IDString Your Firebase Push Sender ID. DEVICE_VERIFICATION_API_KEYString The Google SafetyNet API key, when root detection is active and IS_ROOT_DETECTION_ACTIVEis true.IS_ROOT_DETECTION_ACTIVEBoolean Setting for whether root detection is active or not.
-
-
Connect a device and run the app.
Implement the PingID SDK in your code
This section details the implementation steps of the PingID SDK flows and logic, which are described in Multifactor authentication (MFA) methods and User device pairing.
PingID SDK supports the following software versions:
- Android 5.0 and above.
- Retrieve the organization account alias from the
pingidsdk.propertiesfile.
-
Configure the push messaging sender id:
If you intend to use push messaging in your app, you should have your FCM/GCM SENDER_ID value from either:
-
The google-services.json file located in your project.
-
The Google developer console, in the package that represents your application at https://console.firebase.google.com.
-
-
Add the PingID SDK component into your existing project:
-
Configure your project with gradle. Refer to http://developer.android.com/sdk/installing/studio-build.html.
-
Open your top level
build.gradlefile, to add the PingID SDK component as a dependency. Add the following lines to theallprojectsnode under therepositoriesnode:flatDir { dirs 'libs' } -
Create a
libsfolder inside your module’s folder. Copy the PingID SDK component filePingID_SDK.aarinto it. -
Inside the module or modules using the PingID SDK component, add the following dependency:
{ compile(name: 'PingID_SDK', ext: 'aar') } -
As the PingID SDK component is loaded locally, you’ll have to add the PingID SDK component’s dependencies manually in order to be able to compile and run it. The correct dependencies can be found in the Moderno sample project and application levels
build.gradlefiles. Due to the change to Android API level 29, AndroidX support is added according to the gradle.properties file in the Moderno sample project. -
Open the
build.gradlefile at the application level, and update the relevant constants from the following list, under thebuildTypessection. Explanations for each constant are provided inline, in the file:Constant Type Description CUSTOMER_SERVER_BASE_URLString The server URL, when using your own customer server.
You can define only one of eitherCUSTOMER_SERVER_BASE_URLorOIDC_ISSUER.APP_IDString The App ID, as defined in the PingOne Admin console. OIDC_ISSUERString When using a PingFederate server, this is the OIDC issuer from which the configuration will be discovered. This is your base PingFederate server URL.
You can define only one of eitherCUSTOMER_SERVER_BASE_URLorOIDC_ISSUER.PUSH_SENDER_IDString Your Firebase Push Sender ID. DEVICE_VERIFICATION_API_KEYString The Google SafetyNet API key, when root detection is active and IS_ROOT_DETECTION_ACTIVEis true.IS_ROOT_DETECTION_ACTIVEBoolean Setting for whether root detection is active or not.
-
-
Integrate the PingID SDK component into your code.
-
Initialize the PingID SDK singleton:
PingID.init(<Android application object>, <Application ID>, <Object implementing PingIDSDKEvents>,<Push sender ID>, <Supported MFA type>);- Arguments:
- Android application object: The Android application instance of the customer mobile application.
- Application ID: The application identifier from the PingOne admin console.
- Object implementing PingIDSDKEvents: The object which implements the PingIDSDKEvents interface.
- Push sender ID: The GCM/FCM sender ID.
- Supported MFA type: The registration mode for pairing. Possible registration mode values:
Automatic: MFA supports remote notifications with automatic fallback to one time passcode.EnforceRemoteNotifications: MFA supports remote notifications only.DisableRemoteNotifications: MFA will not support remote notifications and will only support one time passcode.
- Arguments:
- Integrate the PingID SDK component into the authentication process.
-
In the login request to the customer server, add a string parameter, for passing the payload from the customer mobile application’s PingID SDK component:
payload = PingID.getInstance().generatePayload();... //LoginRequest is a bean used to store data passed to the authentication server LoginRequest request = new LoginRequest(); request.setPingIdPayload(payload); -
In the authentication request, you’ll receive information regarding the result of the PingID SDK multifactor authentication.
String serverPayload = response.getServerPayload(); PingID.getInstance().setServerPayload(serverPayload);After passing the server payload to the PingID SDK component, it will be parsed and processed. If there is anything required to be done by the customer mobile application, an appropriate event will be triggered. Refer to Implement the PingIDSdkEvents interface for details.
-
-
Working with push messages in Android
This section details the steps needed in order to work with push messages in Android:
PingID SDK utilizes push messaging in order to authenticate the end users. PingID SDK can work side by side within an app that uses push messaging. This page details the steps needed in order to work with push messages in Android.
Your application will receive push messages from the PingID SDK server, and also from other sources. As a result, your implementation of the push messaging service (GcmListenerService or FirebaseMessagingService) will have a higher priority than the PingID SDK component’s push messaging listener. Your push messaging service implementation will then have to differentiate between push messages sent from the PingID SDK server and other messages, and pass them to the PingID SDK component for processing.
- Configure the push messaging sender ID, according to the instructions in the previous section.
-
In your app, add the appropriate sections in your androidmanifest.xml file (GCM listener / FCM messaging service), and add the appropriate class.
-
You will need to differentiate between push messages for PingID SDK and for other types of push messages you might send.
- Add code that checks if the message received is intended for the PingID SDK component or for your application. In order to easily differentiate between the types of push messages, the data sent from the PingID SDK server will contain a key called "pingidsdk", which will have a value of "true".
-
If the message received is intended for the PingID SDK component, invoke the static function PingIdPushHelper.handlePushMessage with the data from the push message, as follows:
PingIdPushHelper.handlePushMessage(getApplicationContext(), from, data);
The PingIdPushHelper.handlePushMessage function receives three arguments: - Application context
- Push sender ID (from argument)
- Bundle with the data from the server (data argument)
-
Examples:
-
GCM example:
Pass the arguments you received in your
GcmListenerServiceclass, as follows:@Override public void onMessageReceived(String from, Bundle data) { if (data.containsKey("pingidsdk") && data.getString("pingidsdk").equals("true")) { Log.i(TAG, "this Gcm msg is intended for the PingID SDK. msg:" + data.getString("message")); pingidsdkclient.fcm.PingIdPushHelper.handlePushMessage(getApplicationContext(), from, data); } else{ //This message is not a PingID SDK, continue processing... } } -
FCM example:
Extract the bundle data and sender ID from the
RemoteMessageobject you received in yourFirebaseMessagingServiceclass, as follows:@Override public void onMessageReceived(RemoteMessage message) { Map<String, String> dataMap = message.getData(); if (dataMap.containsKey("pingidsdk") && dataMap.get("pingidsdk").equals("true")) { Log.i(TAG, "this Fcm msg is intended for the PingID SDK. msg:" + dataMap.get("message")); //we need to convert the data from the RemoteMessage to a Bundle Bundle data = new Bundle(); for (Map.Entry<String, String> entry : dataMap.entrySet()) { data.putString(entry.getKey(), entry.getValue()); } PingIdPushHelper.handlePushMessage(getApplicationContext(), message.getFrom(), data); } else { //This message is not a PingID SDK message, continue processing... } }
Please review the demo app to see a complete example of push messages for Android in PingID SDK.
-
Implement the PingIDSdkEvents interface
The PingIDSdkEvents interface is the mechanism that the PingID SDK server uses in order to communicate with the customer mobile application, and notify it about certain events. The PingIDSdkEvents interface needs to be implemented by an activity or a class that you’ll be using during the authentication of your user.
Pairing events
onPairingOptionsRequired(List<String> availableTrustLevels, DeviceDetails deviceDetails):
- Notifies the customer mobile application that the device can be paired, and that the user or the app need to specify how to proceed: Pair the device as a primary device, a trusted device or ignore the request.
onPairingOptionsRequiredWithPasscode(List<String> availableTrustLevels, String deviceName):
- Similar to
onPairingOptionsRequired, but is made on a second device when the primary device of the user is not accessible. In this state, the user should be prompted to choose how to proceed (pair as primary/trusted, or ignore the device) and also enter the one time password (OTP) from a primary/trusted device.
onPairingProgress(String msg):
- Notifies the customer mobile application about progress of the pairing process.
onPairingCompleted\(PIDActionStatus status, PIDErrorDomain pidErrorDomain\):
- Notifies the customer mobile application about the completion of the pairing process.
PIDActionStatusspecifies success or failure.PIDErrorDomainspecifies the error in case of a failure.
onIgnoreDeviceCompleted(PIDActionStatus status, PIDErrorDomain pidErrorDomain):
- Notifies the customer mobile application about the completion of an ignore device operation.
PIDActionStatusspecifies success or failure.PIDErrorDomainspecifies the error in case of a failure.
Authentication events
onAuthenticationRequired(Bundle data):
- Indicates that the customer mobile application should verify the user’s identity, using a PIN code, fingerprint, or any other means. The
Bundleobject contains several data items:- Client parameters (key:
client_context): a string passed by the customer server side that can be used to customize the behavior and configuration of the customer mobile application. - Timeout: specifies the timeout for this authentication flow.
- Client parameters (key:
onAuthenticationCompleted(PIDActionStatus status, PIDActionType actionType, PIDErrorDomain pidErrorDomain):
-
Returns the result of the authentication after the PingID SDK component has updated the PingID SDK server with the results.
-
PIDActionStatuscontains the result (SUCCESSorFAILURE) of the process. -
PIDActionTypecontains the action that the user has chosen (approve/deny/block). -
PIDErrorDomaincontains a more specific error, in cases of failure.
onAuthenticationCancelled():
- Indicates that an authentication request has been cancelled, for the current session.
onOneTimePasscodeChanged(String newOneTimePasscode):
- Indicates that the One Time Passcode value for this device has changed.
General events
onGeneralMessage(String msg):
- Passes general information from the PingID SDK component to the customer mobile application for debugging.
onError(Throwable throwable, String description):
- Indicates an error in an asynchronous operation made by PingID SDK.
onGooglePlayServicesStatusReceived(int status):
- Indicates that PingID SDK checked the availability and version of Google Play services. If the value returned is 2 (
ConnectionResult.SERVICE_VERSION_UPDATE_REQUIRED), then the customer mobile application is required to prompt the user to upgrade the Google Play service for the PingID SDK component to fully work.
onLogsSentToServer(PingID.PIDActionStatus status, String supportId):
- Indicates that uploading logs to the PingID SDK server has completed. Arguments:
statuscontains the result (SUCCESSorFAILURE) of the process.supportIdcontains a number that can be used by the developer as a reference, when contacting Ping Identity’s support to trace the error.